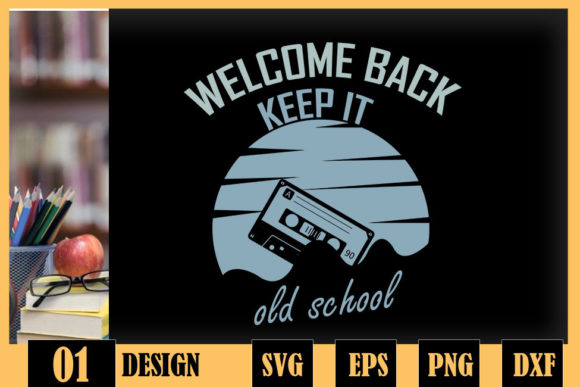
Back to School Keep It Old School
There’s something about the start of a new school year that calls for fresh supplies and new routines. Yet lately, many creators and designers are turning away from flashy, mass-produced themes and toward a quieter, more timeless aesthetic. “Back to School Keep It Old School” captures this shift perfectly. It’s a design direction that blends the warmth of vintage classroom imagery with the precision of modern cutting and printing tools. Whether you’re making labels for a teacher’s desk, creating a retro-themed sticker pack, or building a cohesive set of décor for a school event, this approach offers both inspiration and practicality. It’s not about nostalgia for its own sake—it’s about borrowing the best of the past to make something that feels grounded, clear, and personal.
What Makes “Back to School Keep It Old School” Resonate
At its core, this concept strips away the noise of overly themed graphics and focuses on what actually worked decades ago: simple shapes, warm colors, and typography that feels hand-drawn or typewritten. Think ruled notebook paper, classic red apples, chalkboards with subtle texture, and globes that aren’t perfectly round but still teach you something. These elements don’t need trends to stay relevant. They carry a built-in authenticity that resonates with adults who remember them and kids who appreciate the contrast to digital overload. For creators, this means you can reuse these motifs across seasons without them feeling stale. A design featuring a vintage pencil can work for a back‑to‑school project, a writing workshop flyer, or even a “Dad’s Office” label—all with minimal tweaks.
Creative Directions and Project Ideas
The versatility of the old school theme is one of its strongest assets. You can take it in several directions depending on your audience and final use.
For Classroom and Teaching
Teachers spend a small fortune on décor that often falls apart or doesn’t match the vibe of their classroom. Old school designs help create a calm, focused environment. Consider a set of alphabet posters where each letter is paired with a vintage object—an apple for A, a book for B, a compass for C. Use SVG files to cut these from cardstock, or PNGs to print to standard letter size. You can also make daily schedule cards with a chalkboard style: “Math” in a serif font on a dark green background, “Reading” in a cursive script. These are easy to adapt if you switch classes or years because the design isn’t tied to a specific date.
For Small Business and Product Design
If you sell on Etsy, Shopify, or at local markets, “Back to School Keep It Old School” gives your products a distinct personality. Instead of designing yet another generic “First Day” banner, offer a set of wooden apple shapes engraved with the year—using EPS files you can scale for laser engravers or DXF for Cricut. You can also create pencil toppers in the shape of old milk bottles, glue bottles that look like apothecary jars, or sticker sheets with tiny school bus silhouettes and alphabet blocks. The old school aesthetic works especially well for unisex and age‑neutral products, so you don’t limit your customer base.
For Personal Crafting and Gifting
Hobbyists can use these designs to make thoughtful, handmade presents. A planner cover with a retro abacus decoration, a notebook embossed with a typewriter quote, or a set of gift tags shaped like little chalkboards. Because the file formats are interchangeable—SVG for your Cricut, PNG for a print‑and‑cut on Silhouette, EPS for resizing in Illustrator—you can work with what you already have without buying new software. The old school theme also works for non‑school events: create a “back to basics” care package for a friend who’s stressed, using tags that say “Eat,” “Read,” “Rest,” all styled like vintage bookplates.
Adapting Designs for Different Audiences and Platforms
One of the biggest mistakes creators make is using the exact same design for teachers, parents, and corporate clients. With the old school approach, you can tweak the tone without starting from scratch. For a preschool audience, choose brighter versions of classic colors—warm yellow instead of tan, soft red instead of burgundy—and use thicker outlines for cutting. For a high school or college audience, lean into monochrome black‑and‑white with a vintage blueprint or newspaper texture. For a professional development workshop, swap the apple for a stack of books and add a modern sans‑serif headline. Because the core elements (ruled lines, chalk textures, classic symbols) remain, you maintain consistency while serving different needs.
For bloggers and social media creators, the old school look works well as a background for quote graphics or cover images. Use a faded grid paper overlay with a handwritten quote about learning. Post it on Instagram as a carousel—the simplicity helps the message stand out. For Pinterest, create thumbnails that mimic a vintage flashcard: one main image, a bold word, and a subtle border. The consistent colors and textures across your board will build a recognizable brand.
Choosing the Right File Format for Your Workflow
To get the most out of your old school designs, match the file format to your software and intended output. Each format has a strength, and knowing when to use which saves time and frustration.
Working with Cricut Design Space
SVG is your best friend here. It preserves vector shapes and allows you to separate layers for different colors or materials. For a layered apple cut, you’d have the red body, the green leaf, and the brown stem as separate paths. DXF also works well in Cricut, especially if you’re importing from CAD‑style sources, but SVGs typically offer better support for text and complex curves. Before cutting, check that all paths are closed and that there are no extra white layers that might cause errors.
Using PNG in Silhouette Studio and Microsoft Office
PNG files with transparent backgrounds are ideal when you need a flat, printable design that you don’t plan to resize much. Silhouette Studio handles PNGs well for print‑and‑cut projects if you plan to cut around shapes. For Microsoft Word or Publisher, PNGs let you insert a ready‑to‑use image without worrying about font embedding or vector complexity. If you’re making a simple flyer or a classroom name tag, drop a high‑resolution PNG into your document and you’re done. Keep the resolution at 300 DPI to avoid pixelation when printed.
EPS for Vector Editors
Adobe Illustrator and CorelDraw users should rely on EPS files. They retain editable paths, so you can change the outline thickness, adjust curves, or recolor individual parts. An EPS of a vintage schoolhouse, for example, lets you tweak the roof color or remove the porch later. Always confirm that the EPS contains vector data, not embedded raster previews. When you open it, use the direct selection tool to check that each element is separate.
DXF as an Alternative
DXF is a universal format that many cutting machines accept, including Cricut. It’s especially useful if you receive designs from someone using 3D modeling or engineering software. The downside is that DXF doesn’t always support complex curves or fills perfectly, so run a test cut before committing to a full project. For old school designs with simple silhouettes—a single apple, a globe outline—DXF works flawlessly.
Practical Tips for Consistent and Professional Results
No matter which software or format you use, a few practices will keep your old school projects looking intentional rather than messy.
- Limit your palette. Old school works best with two to four muted colors per design. Red, cream, black, and kraft brown are a safe starting point. Too many brights or neons will break the vintage feel.
- Use texture sparingly. A subtle chalk pattern or paper grain adds depth, but don’t let it compete with the main subject. Apply texture only to backgrounds or large shapes.
- Test scale on paper. A design that looks perfect on screen may feel too small when cut or too large when printed on an 8.5×11 sheet. Always print a single draft version first, especially for layered SVGs.
- Keep typography clean. Choose one display font (typewriter, script, or slab serif) and one body font. Avoid mixing three or more styles unless you’re deliberately making a collage.
- Export with intention. For SVGs, simplify paths before export. For PNGs, use “Save for Web” with transparency. For EPS, tick “Include CMYK” if you plan to print commercially.
Final Thoughts
The beauty of “Back to School Keep It Old School” is that it doesn’t demand perfect symmetry or cutting‑edge software. It rewards careful attention to shape, material, and purpose. Whether you are a teacher crafting a bulletin board, a designer building a product line, or a parent making a one‑of‑a‑kind pencil case, these classic visuals give you a foundation that is both flexible and durable. Start with one motif—maybe a simple globe or an open book—and see how it adapts across formats and uses. Often, the most memorable designs are the ones that feel like they’ve always been there, quietly ready for the next school year.